
In this guide, we’ll set up a reusable design system and use it to create a social media post template. A design system is a set of rules for colors, fonts, logo usage and layout.
You’ll need a paid Claude plan with access to Design. The feature is included in the Pro, Max, Team and Enterprise plans, and usage limits apply. You’ll find the latest terms in the official getting started guide.
The steps and screenshots show the standalone Claude Design environment. In the integrated version of Claude, design systems are available under “Settings > Design systems”, so the menus may differ.
1. Open the design systems section
Go to claude.ai/design, select “Design systems” and click “Create design system”. You can also try the ready-made systems, but create a separate one for your company’s style.
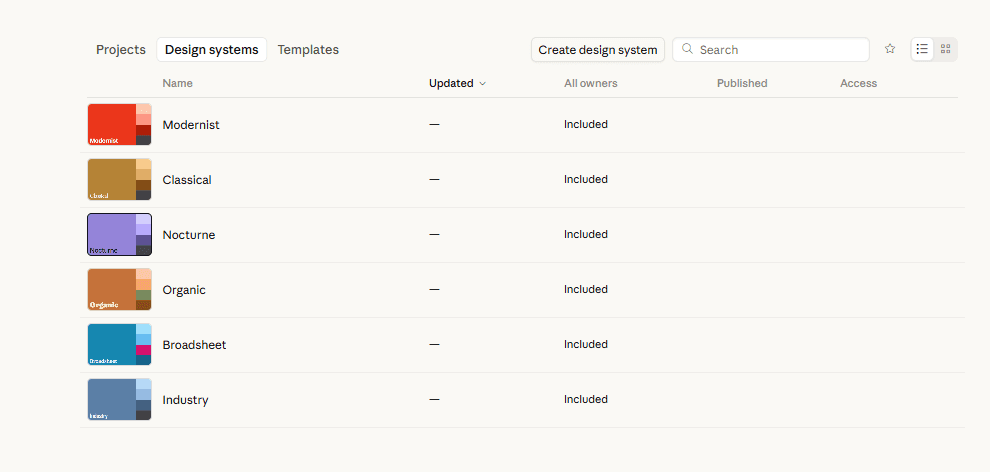
Figure 1. The list of design systems and creating a new system.
In the window that opens, select “Create here”.
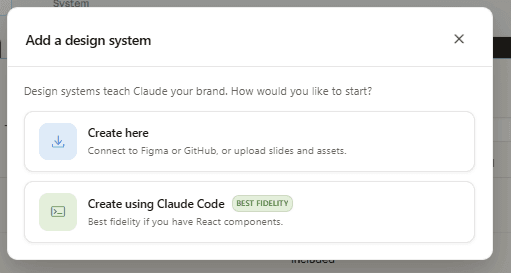
Figure 2. Selecting “Create here”.
2. Briefly introduce your company
In the “Company name and blurb” field, enter your company name, what it does and who its audience is. For example: “Milios – AI consulting, training and solution implementation for small and medium-sized businesses. The style is clear, solid and professional.”

Figure 3. The company description and design sources form.
3. Add your existing visual materials
You don’t need to fill in every field. One clear source is enough to start with:
Style guide and logos. Add PDFs, logo files and fonts under “Add fonts, logos and assets”.
Figma design. Upload your existing .fig file to the field dedicated to it.
Website code. Add a GitHub link or a local folder with the styles and components you use.
Examples of your website or previous visuals. If you don’t have code, upload clear screenshots or a document that reflects your style.
If you’re using code, point to specific design files, for example “styles.css”, “components/ui” and “assets”. For WordPress, choose the materials of the active theme: a mix of several themes or unused styles can be misleading.
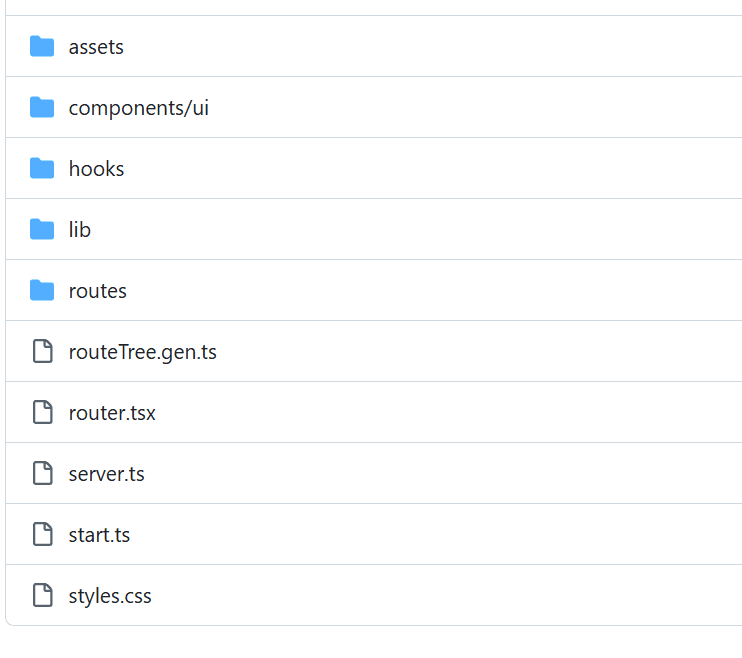
Figure 4. An example folder with styles and components.
In my example, I uploaded the Milios style guide and logo files. If you don’t have a brand identity yet, start from a suggested system and describe the direction you want – you’ll need to review and refine the resulting style.
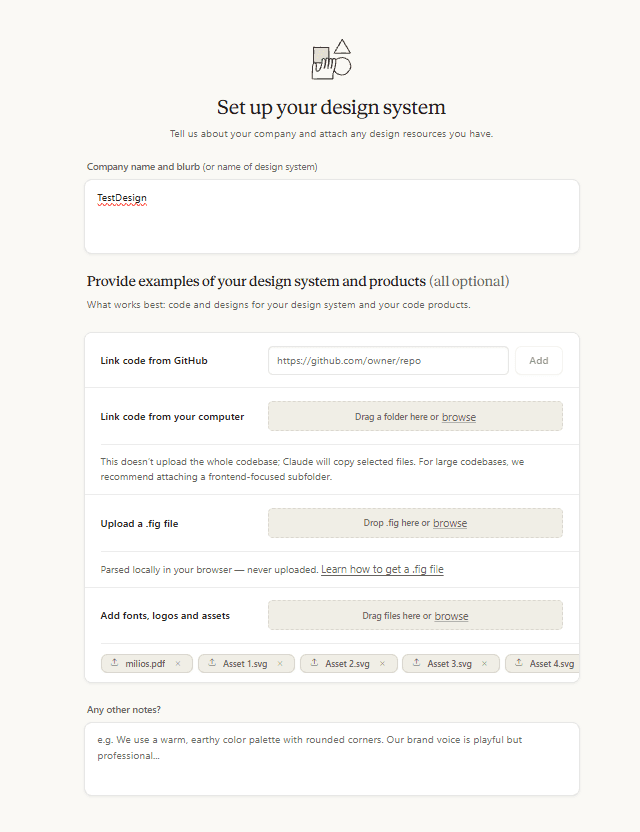
Figure 5. The added style guide and logo files.
4. Refine the rules and review the system
Enter any additional instructions in “Any other notes?”. For example:
Follow the uploaded style guide. Use only the colors and fonts specified in it. Don’t change the logo. Create clear, uncluttered layouts with easy-to-read headings.
Finish creating the system and review what was generated: are the colors, fonts and logo right? Ask for any inaccuracies to be fixed. If your team will use the system, check that it’s published (“Published”) in the right organization.

Figure 6. The finished Milios design system.
5. Create your first template
Start a new design project with your system. In my test, a short prompt was enough: “Create a Facebook post image template for me.”
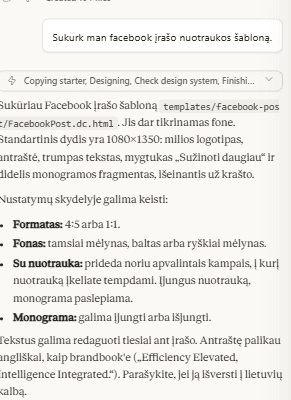
Figure 7. The initial prompt and the template suggested by Claude.
For a more precise result, you can use a prompt like this:
Create a reusable Facebook post visual template based on the selected Milios design system. Format: 1080 × 1350 px. Audience: managers of small and medium-sized businesses. Headline: “Less manual work. More time for business.” Short text: “Practical AI solutions for everyday processes.” Use the uploaded logo and the defined colors and fonts. Leave enough white space. All text in Lithuanian. The headline and short text should be easy to change for the next post.
Review the first version. A precise correction, such as “make the headline bigger and the logo smaller”, helps describe the result you want more clearly.
6. Download the visual
In the environment shown in the screenshots, click “Share”, then “More formats and apps”.
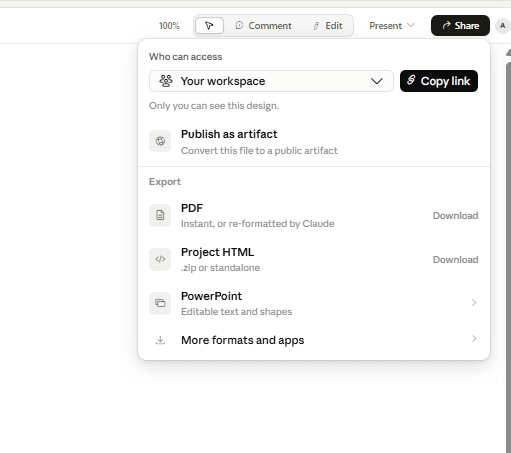
Figure 8. Export options in the “Share” menu.
Select “PNG”, then mark the area of the visual to export.
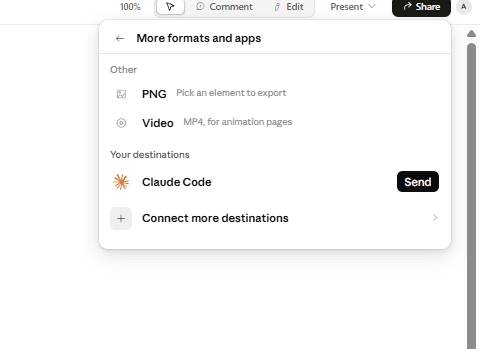
Figure 9. Selecting the PNG format.
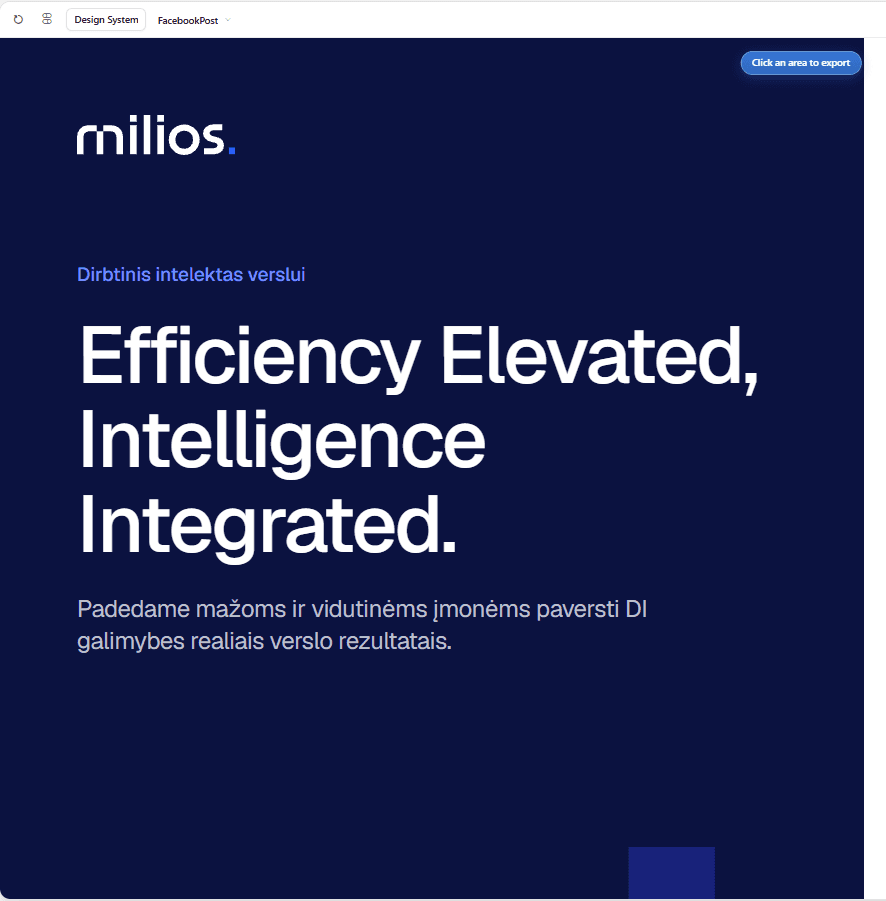
Figure 10. An example of the Milios template in export mode.
Before publishing, check the text, logo, image size and readability on a phone. In the example, the headline remained in English – if your content is meant for a Lithuanian-speaking audience, ask for it to be changed before exporting.
Use the same template for your next post, changing the topic and text. This way, a company style you set up once becomes the foundation for all your future communication.
If you want your whole team to use AI tools like this in their daily work, take a look at our AI training for companies.
Official sources: getting started guide · setting up a design system.
In a short call we’ll work out which process is worth starting with in your company.